Search This Blog

Wednesday, November 17, 2010

Thanksgiving Turkey

I can't believe it's here already; the Culinary Olympics if you will, otherwise known as Thanksgiving.  I've been thinking of my menu since October when the November issue of Bon Appetit arrived in my mailbox with a turkey on the cover.  It always shocks me when it first comes and then before I know it I still haven't figured out my menu.  Not to sound like the over 30 year old that I am, but seriously, where does the time go?  This is the first year that we are officially hosting.  Last year Johnny and I did most of the cooking at his parents house, but this year we will officially host the 'meal of the year' in our own kitchen.  It was a great practice run last year and little did I know that the pictures taken from last year would end up being a blog post this year.  (You'll forgive me if I don't actually make an entire additional turkey just for your sake because seriously once in two weeks is plenty, in fact once a year is plenty.  Although you might not think that when you make this one.)
I wish I had a family recipe to pass on, but my mom actually didn't host Thanksgiving while we were growing up.  Christmas Eve was always her big holiday meal and we usually spent Thanksgiving at my Mimi and Grandpa Winn's.  I'm sure my mom brought something to contribute to the meal, my guess would be pie, although I was young enough and cared too little about cooking at the time to remember.  There were a couple of years when my mom did host after it was a bit too much for my grandparents to handle.  I'm not sure that we ever had a crowd less than 15 so it was always an enormous bird and I remember my mom getting up in the wee hours (okay wee hours for a teenager/college student, but that could mean 9 am) to put the turkey in.  For me the turkey was never the star of the show, just a very elaborate means to make gravy.  I mostly cared about the stuffing, mashed potatoes, gravy and sides... until last year that is.  You see it's not that everyone else doesn't make a turkey as good as the one we had last year (if I do say so myself) it's just that this one is that good.  First of all, I think it's pretty difficult to get a moist bird that is 20 lbs or so.  By the time the inside is cooked the outside is dry.  Second of all I was introduced to brining a couple of years ago at a cooking class and will never NEVER go back on brining a bird, or any white meat for that matter, I first started with pork tenderloin and now am brine addicted.
This recipe comes from my foodie friend/culinary inspiration and one of my best friends, Patty.  She found it in Cooks Illustrated and said the first time she made it everyone at the table said it was the best turkey they had ever had.  I told her she need not say more and to send me the recipe.  Last year when we made it, Johnny removed it from the oven and we each tried a little nibble.  I had a piece of a carmelized vegetable at the bottom of the pan and thought if it was any indication of how good the turkey itself would be then we would all be quite pleased.  It was and and we were and it's what I am making a week from tomorrow (eek!  a week from tomorrow?!?)... now, just what to have with it is in question...
Trish's Tips:  This is clearly an involved recipe, but like I wrote above, this is the culinary olympics, and the turkey is the star of the show... go for it!  Here are some things to keep in mind.

1.  You will need to start Wednesday afternoon to allow time for brining, drying and cooking.  The brining makes for a moist bird.  The drying makes for crisp skin.  (That doesn't include thawing time if you are starting with a frozen bird.)
2.  If you've never trussed meat (and seriously, who has?) then it may seem confusing.  Basically the reason to do so is that everything is held tight and so that the legs and wings aren't burnt by the time the breasts and the rest of the turkey is done.  Need help on trussing the turkey?  Check out this link.
3.  If this is your first time making a turkey then you might want to held really tight to every step here, but like with most recipes you have a lot to take into consideration like the size of your bird, etc when determining cooking time.  Be flexible and buy a good thermometer.
4.  The flipping seemed a bit cumbersome in light of the millions of other things that the chef has to do the day of, but it again adds to a moist bird.
5.  It is so important to let any meat rest after taking it out of the oven and before carving.  If you cut into it right away all of those precious juices that you worked so hard to attain will just rush right out.  Give it 30-45 minutes at to rest.  This will give you time to finish the gravy.
6.  What?  Carving?  Check this out...
7.  If using giblets weirds you out then just omit that step and start with the onions.  I went for it last year but can see how people have a hard time with it.
8.  Don't forget to thaw your turkey completely!  It also doesn't hurt to take it out of the fridge a half hour or so before you cook it, give it time to take the chill off.
9.  Buy the best turkey you can afford.  We ordered a hormone free organic one from the farmers market.  At first it seemed expensive, but anything compared to 99 cents a pound at the grocery store will seem expensive.  The price of a good one is what you would pay for a decent meal out for two people but meanwhile it will feed many more... with leftovers.  The flavor is unmatched.  Don't cheap out here....
10.  My anal tendencies came out when I made a spreadsheet last year to plot everything out; when to put what in, flip what, start potatoes, etc.  Of course keep in mind I do make a spreadsheet for just about everything.  Don't worry, it's not required but it doesn't hurt to work backwards from when you want to eat, just a piece of scratch paper will work!   The cooking time here for us for the same size bird was basically spot on.  I initially added a half hour to my timeline thinking with all of the opening of the oven, etc it would be off but it wasn't.
11.  I've had salmonella before and you don't want to be known for giving it to your guests and definitely not on Thanksgiving.  As with all poultry practice precautions.  Wash your hands after you touch it every time and give everything the raw turkey touches a good spray down.
12.  Have more of just about everything here.  Your turkey may need more stuffing, or your roasting pan may need less depending on it's size.  I always find I need more stock and can you ever have enough butter?
13.  Lastly, roll with it.  Mistakes are bound to happen and imagine them as future stories to tell around the Thanksgiving table.  Delicious gravy can cure an overdone/dry and/or burnt bird.

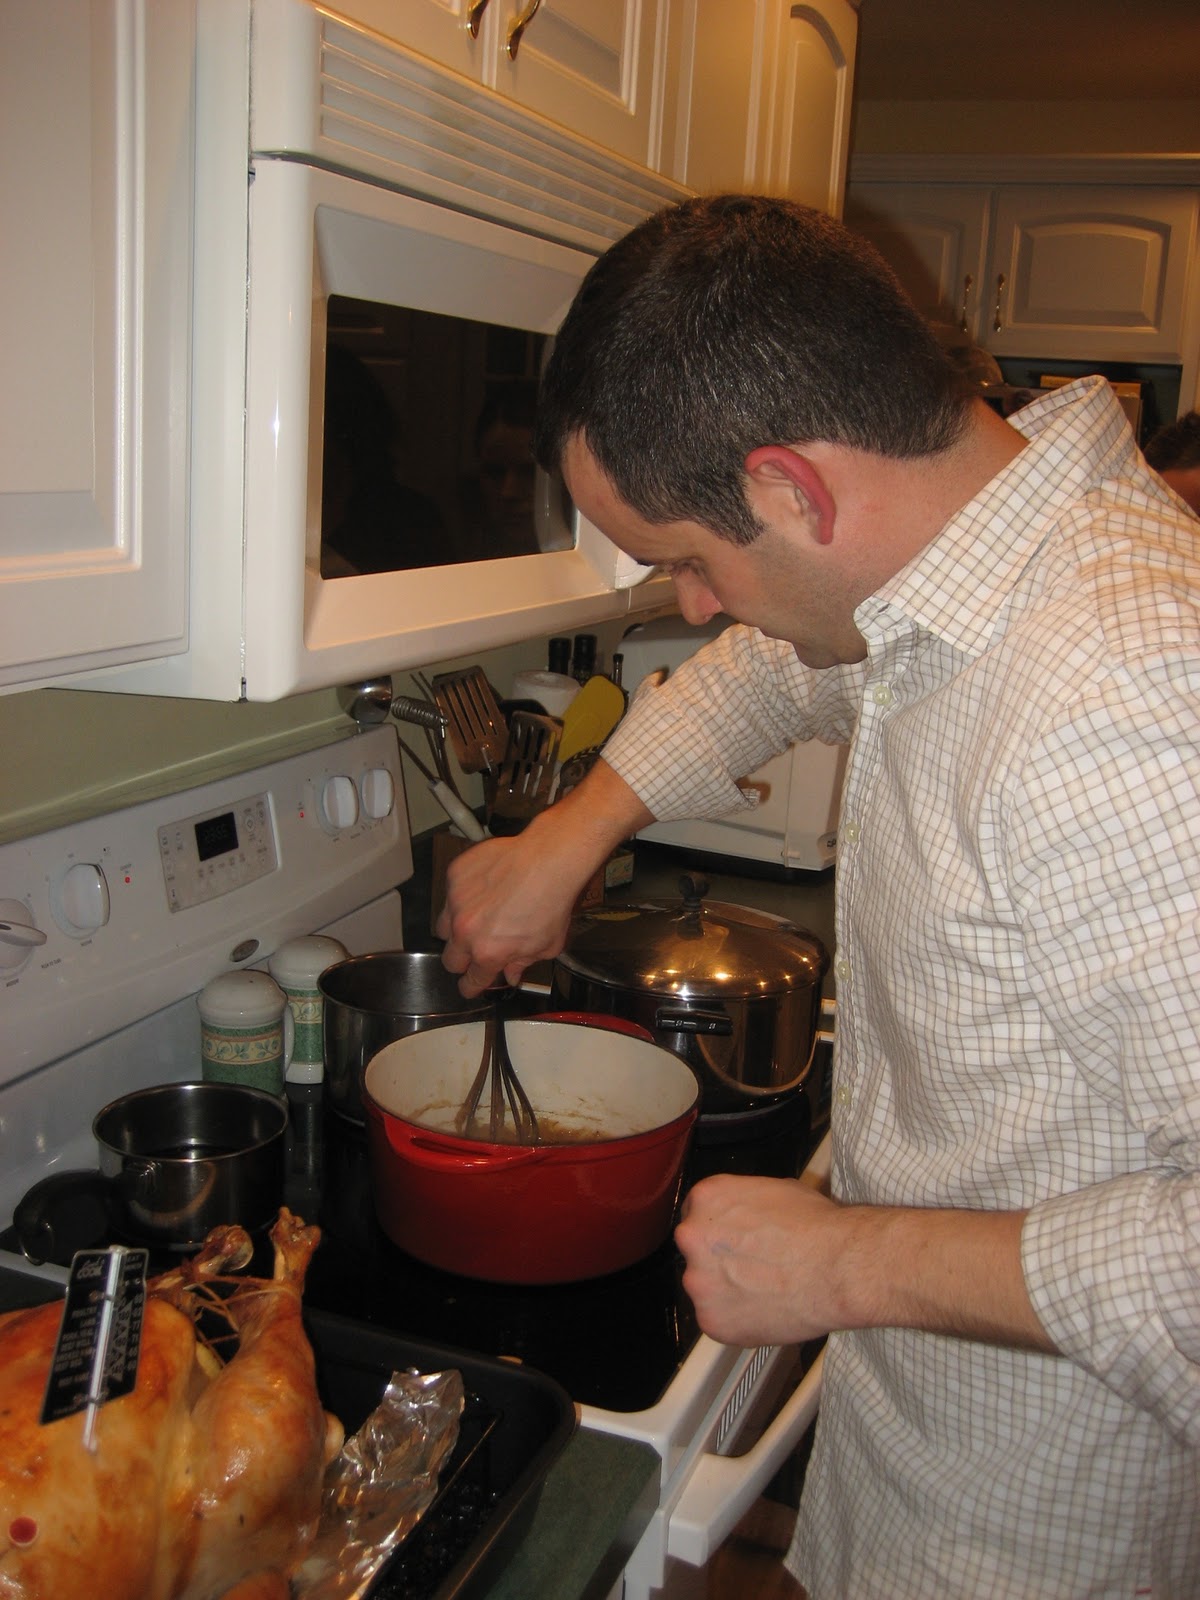
p.s.  As the photos may suggest I wasn't alone in cooking the turkey.  Okay, truth be told it was truly Johnny's responsibility under the very close watch of yours truly.  Okay, I will give credit where credit is due.  I found the recipe, wrote the instructions, created the timeline and supervised, but it was really Johnny who made it.  And he's not even a foodie!  See, now don't you feel even more empowered to conquer the task!  Oh and one more thing... Happy Thanksgiving!  May we all be grateful for everything we have been blessed with.  Hope you have a blessed holiday.

Roast Thanksgiving Turkey

Equipment needed:
Large bucket, cooler or brining bag that will hold turkey with brine
Aluminum foil
Roasting pan with v-rack
String to tie turkey
Meat Thermometer

Ingredients:
4 cups kosher salt
1 turkey (12 to 14 lb gross weight), rinsed thoroughly; giblets, neck and tailpiece removed.  (reserve for gravy if you wish)
3 medium onions, chopped coarse
2 small carrots, chopped coarse
2 celery ribs, chopped coarse
several sprigs fresh thyme
several leaves fresh sage
1 TBL whole peppercorns
6 tablespoons unsalted butter, melted

1. Dissolve salt in 2 gallons cold water in large stockpot or clean bucket.  Add a few sage leaves and peppercorns.  Add turkey and refrigerate for 4 to 6 hours.  (Alternatively you can halve the salt and brine for 12 hours or overnight.  If you don't half the salt it will be overly salty.)
2.  Remove turkey from salt water and rinse well under cool running water.  Pat dry inside and out with paper towels.  Place turkey breast-side up on flat wire rack over rimmed baking sheet or roasting pan and refrigerate, uncovered, 8 to 24 hours.
3.  Adjust oven rack to lowest position and heat oven to 400 degrees.  Toss one-third of onions, carrots and celery with 2 sprigs of thyme and 3 sage leaves and 1 TBL butter in medium bowl,  fill cavity with mixture.  Tuck wings behind back.  Truss Turkey.
4.  Scatter remaining vegetables (use less or more depending on the size of your pan/turkey), a few sage leaves and sprigs of thyme in shallow roasting pan:  pour 1 cup of water over vegetables.  Set v-rack in pan and line with heavy duty aluminum foil.  Spray foil with cooking spray;  then pierce 20 to 30 small holes in the foil with a pairing knife.  Spread turkey breast with butter then set breast side down on foil lined v-rack.  Brush back of turkey with butter.  Roast 45 minutes.
5.  Remove roasting pan with turkey from oven; brush back with butter.  Using thick wads of paper towels or potholders, rotate turkey leg/wing-side up.  If liquid in bottom of roasting pan has evaporated, add 1/2 cup of water.  Roast 15 minutes longer.
6.  Remove roasting pan with turkey from oven, brush exposed surfaces with butter and using thick wads of paper towels or potholders, rotate turkey on second leg/wing-side up; roast for 15 minutes longer.
7.  Remove roasting pan with turkey from oven, brush exposed surfaces with butter and using thick wads of paper towels or potholders, rotate turkey breast-side up.  Roast until thickest part of breast registers 165 degrees and thickest part of thigh registers 170 to 175 degrees on instant-read thermometer, 30 to 45 minutes longer.  Move turkey from rack to carving board and let rest about 20 to 45 minutes.  Carve and serve with gravy if desired.

Pan Gravy:

Steps 1 & 2 can be completed while the turkey is brining.  While the bird is roasting proceed with step three then complete step 4 while the bird is resting.

Ingredients:
1 TBL canola oil
reserved turkey giblets, neck and tailpiece
1 onion,  chopped
6 cups turkey stock
2 sprigs fresh thyme
8 parsley stems
3 sage leaves
3 TBL unsalted butter
1/4 cup all-purpose flour
1 cup dry white wine
salt and ground black pepper

1.  Heat oil in a large heavy-bottomed saucepan over medium high heat until shimmering but not smoking:  add giblets, neck and tail and saute until golden, about 5 minutes.  Add onion and cook, stirring occasionally until softened about 3 minutes.  Reduce heat to low: cover and cook until turkey parts and onion release their juices about 20 minutes.  Add stock and herbs, increase heat to Medium-high and bring to boil, then reduce heat to low and simmer, uncovered, skimming any scum that may rise to the surface until broth is rich and flavorful about 30 minutes longer.
2.  Strain broth (you should have about 5 cups).  Discard solids.
3.  While turkey is roasting, bring reserved turkey broth to simmer in medium saucepan over medium heat.  Heat butter in large heavy-bottomed saucepan over medium-low heat.  When foam subsides, vigorously whisk in flour to make a roux.  Cook slowly, stirring constantly until nutty brown and fragrant, 10 to 15 minutes.  Vigorously whisk all but 1 cup of hot broth into roux.  Increase heat to medium-high and bring to boil, then reduce heat to medium-low and simmer, stirring occasionally until slightly thickened and flavorful, about 30 minutes longer.  Set aside until turkey is done.
4.  While turkey is resting spoon out and discard some fat from roasting pan.  Leave behind carmelized herbs and vegetables.  Place roasting pan over two burners at medium-high heat.  Return gravy in saucepan to simmer over medium heat.  Add wine to roasting pan and scrape up browned bits clinging to pan bottom:  boil until reduced by half, about 5 minutes.  Add remaining 1 cup broth to roasting pan, then strain mixture into gravy, pressing on solids in strainer to extract as much liquid as possible.  Adjust seasonings with salt and pepper:  serve with turkey.

Sunday, July 25, 2010

Orzo Salad with Lemon, Feta and Pine Nuts

Where I come from everyone has a signature dish.  My mom had several.  Her signature cookies were probably oatmeal butterscotch, her signature bars were Mrs. Carmodie's and she had, despite her lack of seasonal cooking, quite a few seasonal summer salads.  One of her famous ones was potato salad, which true to all of her dishes, there is no actual "recipe".  And I think through her confidence in making it she got a bit 'food snobbish' I guess if you will about anyone who served a store bought version that was most certainly not as good as hers... (So that's where I get it....)  I can picture her on a hot summer day making this.  The process involved enormous metal bowls as my mom never did anything small, pounds of potatoes and pouring vinegar, squirting in mustard and scooping in mayo (or as my grandma calls it "salad dressing").  Another salad that made quite a few appearances was a tuna salad, which also had celery and onion, and mayo oddly.... wait, also vinegar... come to think of it they were almost the same.  Besides the tuna/noodle/potato thing.
Whenever there was a barbecue or graduation party and my mom would offer to bring something, people would request for her to bring this (it was her specialty after all) the same way she always knew what to ask her friends to bring.  Everyone has a strength I guess which is how your signature dish becomes your signature dish.  That and the predictability of it.  My good friends wouldn't be surprised if I was asked to bring a side dish in the summer and I showed up with this so I guess you could say this is my signature summer salad.  But don't worry, it can be yours too... it's definitely not difficult.
Whenever I have made it for barbeques or friends I have always been asked for the recipe so I'm pretty sure you will like it too.  It comes from a cookbook that I have shared with you before, The Bride & Groom Cookbook.  The dressing is light; no mayo (or salad dressing) here, and instead of vinegar it has lemon juice.  I like that it's easy to eat since it's made with orzo (a rice sized shaped pasta), so if you're outside balancing a beer in one hand and a plate in another you could probably manage. 
My mom and I had different tastes when it came to some things but she was quite a fan of this recipe as well, in fact over Memorial Day when we were cleaning up camp (for those of you non-Yoopers out there, that means cabin/cottage) I found a piece of notebook paper with this recipe written on it.  I remember making it and bringing it out to camp for a day on the pontoon and everyone loved it so my mom had to have the recipe, but I'm not sure that she ever made it.  Although I guess that doesn't surprise me, she clearly had already claimed her signature dish; there wasn't much room for one more.
Trish's Tips: 
This keeps well but I would hold off on adding the basil until right before you serve it.  I've made it without olives for some olive-hating friends but I think it's pretty perfect as is.  Add more or less of whatever you like.  Have you toasted pine nuts before?  I've probably told you this, but toast them in a dry skillet.  Watch closely though as they go from lightly golden to black real quick!  I buy a whole bag and do it all at once then keep them in the freezer in a jar so I have them at the ready.
Orzo Salad with Lemon, Feta and Pine Nuts
Adapted from The Bride & Groom Cookbook
by Mary Corpening Barber & Sara Corpening Whiteford

Serves 4

Ingredients:
1/4 Cup Olive Oil
2 TBL fresh lemon juice
1-2 cloves minced garlic
1/2 tsp dried oregano
1/2 tsp kosher salt, plus more as needed
1/4 tsp freshly ground pepper, plus more as needed
1 Cup Orzo
1/4 cup pine nuts (toasted)
1/4 cup golden raisins
3 TBL finely chopped kalamata olives
3 TBL finley chopped red onion
1/4 cup thinly sliced fresh basil
2 oz feta cheese, drained & crumbled

Directions:

Whisk together the olive oil, lemon juice, garlic, oregano and salt and pepper.   Set aside.  Cook orzo according to package directions in boiling salted water.  Drain, put in large bowl and pour dressing over and mix.  Let cool to room temperature while you chop the remaining ingredients.

Add the pine nuts, raisins, olives, red onion and basil and stir to combine.  Add the feta and toss lightly.  Adjust the seasonings with more salt and pepper as necessary.


Wednesday, May 5, 2010

Carrot Cake

My family is very big on tradition.  Especially when it comes to food traditions.  Once something is made once and everyone likes it for a specific occasion you cannot under any circumstances change that tradition.  We wouldn't for example around Christmas just 'try' a new sugar cookie recipe.  Oh no no... that would NOT go over well with our family.  Or try asking for a different pancake recipe, like the 'thick' ones everyone else's mom made as opposed to the Swedish ones my mom always made on Saturday mornings.  Nope, always the same pancake.  Nothing new, nothing different, traditions are just that.
It wasn't even just my mom initiating this 'rule'.  In fact it may not have been my mom at all.  I think with five kids and my dad to please once my mom found a formula that worked it was smart to just stick with that rather than risking a change and having someone be unhappy with the results.   I have at times tried to break recipes that selfishly aren't my favorite.  I'm not a big mashed potatoes fan so one time tried to put a different mashed potato recipe on the menu.  As in, one that did not involve gravy.  Let's just say my responsibilities of making this dish were removed.  Although I have to say I'm not much different; the apple doesn't fall far from the tree.  Once I find a recipe I really, really like I have absolutely zero interest in trying a new version of it.  Why for example would I ever make a different hummus or mac 'n cheese recipe when the one I currently make is so perfect?  I think I'm starting to understand my mom's reasoning.
Birthdays were no different although we did have free reign over our meal of choice but somehow traditions emerged there as my mom tended to make the same thing year after year, per the birthday boy/girl's request.  Somehow I guess we just assumed that's how it worked.  Our tradition as a kid was to have a birthday party with your friends a few days before or after your birthday, usually on the weekend and then on our actual birthdays we would have a family dinner with our grandparents and then would choose the meal and cake that my mom would make.  Oddly enough I can't remember what I usually would pick, probably marble as that seemed to be the perfect choice for an indecisive person like myself...
This carrot cake was my sister's choice.  Although this wasn't her 'birthday-cake-of-choice' until I had moved off to college so I never actually had my mom's version, but last year for my sisters birthday I made it for her.  Of course my mom had adapted it quite a bit from the original and La told me the modifications, albeit loosely.  She told me how my mom would open up the fridge and come back with buttermilk and sour cream and would make the cake with olive oil all the while, La telling her to follow the recipe, but my mom would just say "I know what I'm doing!" and she did.  I tried to recreate it last year and not surprisingly it was a bit off.  It's all a matter of preference and my mom and La prefer it very dense and moist and mine wasn't quite dense enough for La's preference.  This one is a much lighter version, especially compared to most carrot cake recipes, although there is a quick modification to make it more moist and dense if that is how you like it.
When we celebrated my dad and my uncle (his twin)'s birthday here in Chicago I suddenly became the cake maker asking them to choose their cakes.  (How else does one celebrate a birthday?)  My dad chose cheesecake and I have a hunch it may just be cheesecake for now until eternity.  It is oddly also my brother-in-law's and my brother's choice.  Looks like in my family we may be having that recipe at least three times a year, but no complaints here as it really is that good.  Since there would be 12 or so of us celebrating I figured two cakes were in order, and really, shouldn't both birthday boys (okay, more appropriately men) have their own separate choice of cake?  When my uncle requested carrot cake was I immediately knew which recipe I would make.
Luckily for me La wasn't here to celebrate (we missed you La!) as she would have been my toughest critic since I went for the lighter version sans sour cream.  Seeing as this is 'her' birthday cake she wouldn't have been happy with the lighter result.  Although there just may be room for both... two separate birthdays, two different cakes.... We're already on our second year of celebrating my dad and uncles birthday in Chicago so who knows, this may now be my uncle's birthday tradition as well.  Actually whether he chooses it or not, this may be his 'birthday-cake-of-choice'.  There could be some serious uproar if he tried to change it.  Traditions are hard to break in our family...
For some reason they aren't in front of their respective cakes.  That's my dad on the right with the carrot cake and my Uncle Fish on the left with the cheesecake.

Trish's Tips:  To make the moister version replace half the buttermilk with sour cream.  This was how I did it last year and it was much more moist than the version below but still not dense enough for La.  If I made it for her again I would do the same as I did last year but add an additional tablespoon of sour cream.  Also I would grate the carrots on the coarser side vs. the finer side for this version.  Walnuts would also be good here instead of the pecans if you prefer.  Did you know that you could make buttermilk?  That way you can make only what you need.  I no longer buy it because it would always go to waste.  Have you made a layer cake before?  I come from a family of 'delicious' cake bakers but not so much 'beautiful' cake bakers.  Although this is a Martha Stewart recipe, mine certainly doesn't look like Martha Stewart, although there are a couple of tips that I follow to make it both delicious and beautiful.  1.  Absolutely positively wait until the cake has cooled before you frost it and that the cake is at room temp.  2.  If you leave the house as I did while the cake is cooling just cover on the cooling rack with a clean towel.  3.  When frosting, put the cake over strips of wax paper (that can easily be pulled out after you are done frosting).  This will ensure that your cake stand won't look messy for presentation.  4.  There is this concept of a 'crumb layer'.  Frost one layer first, then let kind of dry before applying the second.  This is especially helpful for a chocolate cake with white frosting, but I didn't have a problem here.  5.  This cake makes an incredible amount of frosting and in hindsight I realized I skimped on the middle layer.  Be generous.  6.  I don't have any fancy cake tools and just used a knife to frost and a plastic bag to do the piping.  Be creative!  7.  If your powdered sugar is chunky as mine is usually, make sure to sift so you have nice creamy frosting.  Just a mesh strainer will work, a bit of a tedious process but worth it.
Carrot Cake with Cream Cheese Frosting
Adapted from Martha Stewart

Carrot Cake

Ingredients:
Unsalted butter, for pans
3 Cups all-purpose flour, plus more for pans
1 cup pecan pieces
1 lb large carrots, peeled
3 large eggs, room temperature
1/3 cup nonfat buttermilk
1 tsp pure vanilla
2 Cups sugar
1 1/2 Cups canola oil
2 tsp baking powder
1 tsp baking soda
1 tsp salt
1 tsp ground cinnamon

Directions:
Heat oven to 300 degrees.  Butter two 8 by 2 inch round cake pans.  Dust pans with flour and tap out any access.  Set pans aside  Spread pecans in a dry skillet and toast until fragrant and slightly golden, about 5 minutes.  Finely chop pecans and set aside.

Using the smallest holes of a box grater, grate carrots, yielding 2 1/2 cups.  Place carrots, eggs, buttermilk, vanilla, sugar and canola oil in a large bowl; whisk until well combined.

In a medium bowl, whisk together the flour, baking powder, baking soda, salt and cinnamon.  Using a rubber spatula, fold the flour mixture into the carrot mixture until combined.  Fold in the toasted pecans.

Divide batter between the two cake pans, and bake until a toothpick inserted into the middle comes out clean about 1 hour.  (Start checking at 40 minutes.)  Remove pans from oven and transfer to a wire rack to cool, 15 minutes.  Turn cakes out onto rack; let stand until completely cool.

Place bottom layer on cake stand, frost put top layer on top and finish frosting.

Frosting

Ingredients:
3/4 cup (1 1/2 sticks) unsalted butter, room temperature
3 (8-oz each) cream cheese, room temperature
3 cups powdered sugar
1 tsp vanilla
pinch of salt

Directions:
Place butter in the bowl of an electric mixer fitted with the paddle attachment, and beat on medium-high speed until fluffy, about 2 minutes.  Add cream cheese and beat until well combined and fluffy, about 2 minutes more.  Add the remaining ingredients and beat for 5 minutes more.  Use immediately or store in the refrigerator in an airtight container for up to two days.

Wednesday, April 7, 2010

Lasagna

Like many siblings, my aunt and mom were always a bit competitive with one another.  They were extremely close and each considered each other's best friends so it was definitely just a friendly competition, but still a competition nonetheless.  They weren't competitive at all about money/looks/success or things that I guess people might be competitive with one another about.  They both love garage sales and the thrill of the hunt of finding a great antique.  That may be one of the times the competitiveness would come out.  There was also a lot of "copying one another" going on as also often happens with sisters.  My mom had oh so many collections.  Cookie jars, dishes, the list goes on and on.  My aunt was much more choosy about what she would collect, but you better believe she couldn't start a collection without my mom deciding to collect that too.  Or at Christmas my grandma would almost always give them the same Christmas present (even as adults) and they would rush to be the first one to rip off the wrapping paper to be the one to see the gift first.  My aunt tells me my mom had to do everything first and since my aunt is the younger sister I'm sure that was true...  I would say they were particularly competitive when it came to cooking.  I think my mom thought she had the upper hand since she had much more time to cook (she only worked part-time and my aunt worked full-time).  That's probably why she would be particularly peeved when she would make lasagna and we would all tell her it wasn't as good as my Aunt Susan's.
The thing is... I can see how she had a hard time getting it right.  It's hard to get it the right consistency.
The way I see it there are three kinds of lasagna.  1.  The frozen kind (I think you know how I feel about this)  2.  Dry Lasagna  3.  Soupy Lasagna.  Okay, quite clearly I am oversimplifying things here because as you well know there are white lasagnas and veggie lasagnas and clearly more than three categories, but these three are the ones that I mostly encounter.  Or I guess I should say the three unpleasant kinds that I encounter.  (I know, I know, there are some good frozen lasagnas out there, but of course I'd always rather have homemade.)
I've made lasagna several times before and ended up with a soupy mess.  Perhaps you've experienced this as well where you cut out and scoop out your piece and it seems like all the tomato sauce and juice squirts out into the square where you cut your piece.  As for the dry kind... I'm a sauce lover (as you know from my other blog) so have zero interest in dry lasagna.  I'll take the super liquid-y one instead.
This recipe doesn't fall in any of the three categories.  Unless of course you choose to make it and then freeze, but frozen yet homemade is not the kind I was talking about above.  I was talking about the kind in the flimsy aluminum pan that you buy in a box.  We've all had it... you know what I'm talking about.  I like this one because it is the perfect consistency.  Moist, but not dry.  Although when making it I was kind of holding my breath scared that it would be dry, but it turned out perfect.  I think the fresh mozzarella is the secret as it adds the perfect amount of moisture.
I also like that the ingredients are a little bit more exciting than your run-of-the-mill hamburger and shredded mozzarella that are often used.  Using sausage instead makes a huge difference in flavor in addition to using freshly grated parmesan and goat cheese.  Plus of course the traditional ricotta and red sauce.  It is the perfect 'make-ahead' dish and actually does freeze well.  (Don't worry the non-aluminum pan will give it away that it is definitely homemade, not to mention, of course,the flavor.)
I'm pretty sure my mom would like this recipe too.  Just don't tell her how it compares to my Aunt Susan's.

Trish's Tips:  For some reason I find it hard to find regular old lasagna noodles.  As in not the 'no boil' ones.  Either will work here, but if you use the no boil only soak the noodles for 5 minutes or so.  Use either sweet or spicy sausage depending on your preference.  Turkey sausage will also work well here and would make for a bit lighter lasagna (if it's really possible for lasagna to be light).  Goes great with a green salad and a baguette dipped in olive oil.  This is the epitome of easy entertaining as it is perfect to make in advance.  If you aren't serving 8, I would recommend making the full recipe into two smaller square pans and freezing one.  The thawed and then cooked lasagna may be a bit drier than the original so you may want to add either a bit more sauce or not let the sauce cook down as much.

Lasagna
Adapted from Ina Garten
Serves 8

Ingredients:
2 TBL Olive Oil
1 yellow onion, chopped
2 garlic cloves, minced
1 1/2 lbs sausage, casings removed (Turkey or Pork will both work)
1 28-oz can crushed tomatoes in tomato puree
1 6-oz can tomato paste
1/4 cup chopped fresh flat-leaf parsley, divided
1/2 cup chopped fresh basil leaves
kosher salt
freshly ground black pepper
1/2 lb lasagna noodles
15 oz ricotta cheese
4 oz creamy goat cheese, crumbled
1 cup grated parmesan cheese, plus 1/3 cup for sprinkling
1 egg, lightly beaten
1 lb fresh mozzarella, thinly sliced

Directions:
Preheat the oven to 400.

Heat the olive oil in a large skillet.  Add the onion and cook for 7-10 minutes over medium-low heat until translucent.  Add the garlic and cook for 1 more minute.  Add the sausage and cook over medium-low heat, breaking it up with a fork, for 8 to 10 minutes, or until it is no longer pink.  Add the tomatoes, tomato paste, 2 TBL of the parsley, the basil, 1 1/2 tsp of salt, and 1/2 tsp of pepper.  Simmer, uncovered over medium-low heat for 15-20 minutes or until thickened.

Meanwhile fill a large bowl with the hottest tap water.  Add the noodles and allow them to sit in the water for 20 minutes.  Drain.

In a medium bowl, combine the ricotta, goat cheese, 1 cup of Parmesan, the egg, the remaining 2 TBL of parsley, 1/2 tsp of salt and 1/4 tsp of pepper.  Set aside.

Ladle 1/3 of the sauce into a 9x12x2 inch rectangular baking dish, spreading the sauce over the bottom of the dish.  Then add the layers as follows:  half of the pasta, half the mozzarella, half the ricotta and one third of the sauce.  Add the rest of the pasta, mozzarella, ricotta and finally, sauce.  Sprinkle with 1/3 C of parmesan cheese.  Bake for 30 minutes, until the sauce is bubbling.

Tuesday, March 16, 2010

Fettuccine with Short Rib Ragu

The sun is shining, the snow is (almost) gone, spring is near... and I'm making slow cooked braised short ribs.  True to my blog title I'm still hanging on to winter, from a food perspective that is.  In fact I made this more than once last summer and another time early fall.  It's not really a winter dish, but is good on a cold night with a glass of red wine and a fire.
This is the epitome of the type of recipe that my mom would make.  Her menus often revolved around beef and she loved to cook things that she could start earlier in the day and cook for hours and meals that didn't require being served immediately out of the oven.  With five kids and a husband on different schedules I think she appreciated the ease of a recipe that would reheat well and serve a crowd.  This does both.  She would have loved it although I'm pretty sure she would serve it over mashed potatoes instead of pasta.  She was a potato lover but I guess more than anything, the people she was always cooking for, (us kids) were the potato lovers and she always had them on hand.  She would do the same for Beef Burgundy as it always called to serve over egg noodles or a garlic rubbed crostini but my mom always just bypassed that part of the recipe and made her usual mashed potatoes.
I think I just got burnt out on mashed potatoes as a kid because I'm definitely now more of a pasta lover.  It's a lot easier too, but serve it however you like.
This does take a rather large time commitment.  However, do not let that deter you because most of it is 'inactive' time meaning it is just simmering away while you are doing your Sunday chores, a few loads of laundry or maybe more realistically (like me) reading food blogs and watching Food Network.  It starts out this kind of soupy mixture and somehow over the coarse of a few hours transfers into a thick, rich, flavorful Ragu.
I made it recently for a friend who had a baby and Johnny was incredibly envious.  In fact this is apparently my "bring to a friend who just had a baby" dish because I made it last summer for another friend.  It's great for that because it would be fine to make even a day in advance, but also good for entertaining, or you know, just you and your husband on a warm spring day...
Trish's Tips:  If you can't find pancetta or prosciutto you could also use bacon.  The original recipe calls for pancetta, but I've used prosciutto and it turned out great.  If you are feeling adventurous... this recipe calls for a sprinkling of shaved bittersweet chocolate.  I KNOW... it sounds weird, but it seriously is good.  If you grate it on a microplane you won't even know it is there, it just adds complexity.  Kind of like a Mexican mole.  But feel free to omit as well.  As always, really take the time to let the meat brown very well over high heat, this will give it incredible flavor.
Fettuccine with Short Rib Ragu
Adapted from Giada de Laurentiis
4 to 6 servings


Ingredients:
3 TBL olive oil
2 oz pancetta or prosciutto, coarsely chopped
2 1/2 lb beef short ribs
salt and freshly ground pepper
1/4 cup all-purpose flour
1 medium onion, quartered
1 carrot, peeled and very roughly chopped
1/2 cup fresh flat-leaf parsley leaves
2 garlic cloves
1 (14.5 oz) can tomatoes (whole or diced)
1 TBL tomato paste
1 tsp chopped fresh rosemary
1 TBL fresh thyme leaves
1/2 tsp dried oregano
1 bay leaf
2 1/2 cups beef broth
3/4 cup red wine
1 lb fettuccine
4 to 6 tsp shaved bittersweet chocolate (optional)

Directions:
Heat the olive oil in a large, heavy soup pot over medium heat.  Cook the pancetta until golden and crisp, about 4 minutes.  Meanwhile, season the short ribs with salt and pepper and dredge in flour.  Using a slotted spoon, remove the pancetta from the pan and set it aside.  Shake the excess flour off the short ribs and add them to the pan and cook until browned on all sides about 20 minutes total.  Meanwhile, combine the onion, carrot, parsley, garlic, tomatoes and tomato paste in a food processor and pulse until finely minced.  Once the short ribs are browned, add the minced vegetables to the pot along with the pancetta and stir.  Add the rosemary, thyme, oregano, bay leaf, beef broth, wine, 1/2 tsp salt and 3/4 tsp pepper.  Bring the mixture to a boil, reduce the heat, cover and simmer for 1 hour and 15 minutes.  Remove the lid and simmer for another hour and 30 minutes, stirring occasionally.  Using a slotted spoon, lift out the short ribs and cool briefly on a plate.  Shred the meat with two forks and return it to the pot, discarding the bones.  Discard the bay leaf.

Bring a large pot of salted water to a boil over high heat.  Add the pasta and cook until tender but still firm to the bite, following package directions.  Drain the pasta, reserving 1 cup of the cooking liquid.  Add the pasta to the pot with the short rib ragu and stir to combine.  If needed, add the reserved pasta liquid a little at a time to moisten the pasta.  Transfer to serving bowls and top each bowl with 1 tsp of chocolate shavings and serve immediately.

Tuesday, March 2, 2010

Banana Bread

Banana Bread showed up pretty often around our house growing up and I would imagine yours too.  I can't think of anyone who hasn't tried it.  It's got to be up there in popularity with chocolate chip cookies, and there has got to be a million different recipe combinations out there, just try googling it.  In general I like a lot of different, bold flavors but when it comes to some things I'm a purist.  Like mac 'n cheese for example (I always like to give examples).  I don't want bacon in it and I definitely don't want peas, just the cheese... and macaroni.  And when it comes to a hamburger, yes I love some caramelized onions and mushrooms but I certainly don't want a 'taco' burger with guacamole and taco seasoning.  I just want the burger.  I'm the same way with banana bread.  I've tried banana bread with lime zest and coconut (which was delicious) but generally I just want the standard, traditional recipe.  If you are searching for the same, you have found it.
As I have learned from making this several times, banana bread is not really bread per se, at least not by my definition.  Bread to me is something that requires copious amounts of time and kneading and rising and basically an incredible amount of patience.  So based on that description banana bread certainly does not fit the bill.   To me it was almost like cake batter and I say that because it is quite sweet.  The original recipe called for over two cups of sugar, but I did take that down a bit.  And as my mom would do, I threw in a little healthy ingredient, some flaxseed meal, but you could leave that out if you don't have it.
I don't know about you but no matter how many bananas I buy at least one goes bad.  How is it that they are green in the store and then two days later they are overripe?  Rather than throwing them away I will just put them in the freezer and when I have enough, will make this bread.  In fact, I don't know that I have ever actually bought bananas for it.  If you use frozen they will defrost in only a few hours or of course you can use fresh bananas just make sure that they are really, really ripe as in more ripe than you would normally like to eat.
I know I was just ranting and raving about being a purist and what not with this but I do love walnuts in it, because to me that's what 'goes'.  I'm a big believer that there are two different types of people in this world, those that like nuts and those that don't.  I am a nut lover so always add them although as a kid I didn't like them.  My mom would always make one loaf with nuts and one without to satisfy everyone's tastes so I tend to do the same if I'm not making it for myself.

This recipe comes from an adorable cookbook I received as a wedding shower gift and has plenty of good, homey recipes.  The authors suggest making one loaf to eat now, then, slicing and freezing the other.  You can take directly out of the freezer, toast it and put peanut butter on top.  I've tried it and it's delicious.  (Okay, so maybe I'm not always a purist when it comes to banana bread.)  So go ahead and start collecting those bananas in your freezer.  If you're as terrible an estimator as me it won't take you long to have enough for this recipe.  It's relatively simple to make and the smell of baking it alone will be reason enough to make it.
Trish's Tips:  Make sure to mash the bananas well or you will have bits of banana show up in the bread, not the end of the world, but not quite the right consistency you are looking for.  I just use a potato masher.  If you are like me, you almost never use buttermilk.  Don't buy it, make it instead.  In a small bowl mix 1/2 cup regular milk with 1 1/2 tsp either lemon juice or white vinegar and let sit for 5 minutes.

Unbelievable Banana Bread
makes 2 loaves
Adapted from Bride & Groom First & Forever Cookbook
by Mary Corpening Barber and Sara Corpening Whiteford

Ingredients:
1 1/2 C walnuts
2 1/4 C all-purpose flour
1 tsp kosher salt
1/2 tsp ground cinnamon
3/4 C canola oil
2 C sugar
3 eggs, lightly beaten
1 1/2 tsp vanilla extract
1 1/2 tsp baking soda
1/2 C buttermilk
2 C very ripe mashed bananas (about 5 small bananas)
Cooking spray
2 TBL flaxseed meal (optional)

Directions:
Preheat oven to 350.  Preheat oven in dry skillet over medium heat tossing occasionally until fragrant and golden.  Roughly chop and set aside.

Spray 2 - 9x3 or 9x5 inch loaf pans with cooking spray.  Stir together the flour, kosher salt, cinnamon and flaxseed meal if using in medium-bowl.  Set aside.

Combine the oil and sugar in the bowl of a stand mixer fitted with the paddle attachment.  Alternatively, use a hand mixer and beat on low until combined.  Add eggs and vanilla and beat until incorporated, about 1 minute.

Stir the baking soda into the buttermilk in a small bowl.  Add one third of the dry ingredients to the mixer, followed by half of the buttermilk and mix on low speed until barely combined, 10 to 15 seconds.  Repeat.  Scrape down the sides and mix in the remaining dry ingredients.  Add the mashed bananas and walnuts and mix until just incorporated.  Do not overmix.

Pour the batter into prepared pans.  Bake until the bread is a golden brown and a toothpick inserted into the center comes out clean, about 1 hour.  (Start checking at 45 mins.)  Transfer the pans to wire racks and let cool for 5 minutes, then remove the loaves from the pans and let cool.


Wednesday, February 17, 2010

Spiced Peanut Butter Dip

One of my favorite snacks as a kid was ants on a log.  Three simple ingredients, yet so good.  My strategy was to get an 'ant' in every bite.  I remember my mom packing these in my lunch as a kid and being so excited for lunchtime to pull them out of the Ziploc, or 'baggie' as everyone in my family calls them.  Sure they ended up a bit mangled with peanut butter smeared on the inside of the baggie and the ants were all mashed down into the peanut butter but still very much worth looking forward to.

Ants on a log... you must have had one at some point as a kid.  It's like having a PB&J or Peanut Butter & Banana sandwich.  You know what I'm talking about, right?  Celery with smeared peanut butter and raisins on top?  I thought I should force a reminder in case of the small possibility that my mom made up the name herself.  Like how I thought all kids knew that new shoes could make you run faster then realized later that the only other kids that 'knew' this were my siblings.
Regardless of what you call it, everyone's had one... Unless you were one of those kids I feel bad for that were allergic to peanuts and missed out on all good things that come with that.  Like Reese's Peanut Butter Eggs at Easter or Reese's Pieces at the Movie Theatre (that was always my choice), peanut butter cookies or those totally awesome Little Debbie peanut butter wafer things.  The cool kids (obviously including me) would always eat it layer by layer.  Yeah I feel pretty sorry for the kids who couldn't have peanut butter and you should just stop reading now because you're missing out on something even better...

I found this recipe in a cookbook I received as a wedding present.  Which when I was roaming around Crate & Barrel registering for wedding gifts a few years ago with the little gun thing and saw the title "Delicious Dips" I knew it belonged in my collection.  Anything that I can dip or dunk into I am a fan of, and this dip I am definitely a fan of.  It has peanut butter (of course) and is great served with celery, but that's where the differences to ant on a log end.  There is no 'ant' here and instead is ginger, sugar, garlic, soy sauce all blended up with the peanut butter and then you use the celery to dip in it.  So dip, peanut butter and Asian, three great reasons why I am in love with this dip.
Most of my family is huge peanut butter fans.  My dad's favorite snack is a scoop of peanut butter on a spoon.  And of course his favorite cookie is peanut butter.  Johnny's not much different, if I ask him to make me a piece of toast I am always alarmed at the inch thick layer of peanut butter, the same as he does for his own, so needless to say he loves peanut butter as well and is a HUGE fan of this dip.

In my mind this is the 'adult' version of an ants on a log.  But go ahead and throw yours in a baggie anyway... for old times sake.
Trish's Tips:  This keeps very well in the fridge for a few days.

Spiced Peanut Butter Dip
Adapted from Delicious Dips by Diane Morgan

Ingredients:
2 TBL fresh ginger root, peeled and minced
1 green onion, including green tops, cut into 1/2 inch lengths
1 clove garlic
1/2 tsp sugar
1/2 tsp red pepper flakes
1 cup chunky peanut butter (I used all-natural)
2 TBL low-sodium soy sauce
1 TBL Asian sesame oil

Directions:
In the bowl of a food processor fitted with the metal blade, process the ginger, green onions, garlic, sugar and red pepper flakes until minced.  Add the peanut butter, soy sauce and sesame oil.  Process until all the ingredients are well combined.  Transfer to a serving bowl.  Cover and set aside at room temperature until ready to serve.  Serve with celery sticks.